Published on 6/20/2021
- This blog post was made using Blender 2.83.3 and Unreal Engine 4.26.2
If you haven’t read it, check out part 1 for what we’re importing today.
Now that we have our sliding door animation sorted, we need to bring it into the game engine to make use of it. In Blender, the hierarchy currently shows the armature as the main node of this mechanism, and the two door geometries are children of it.
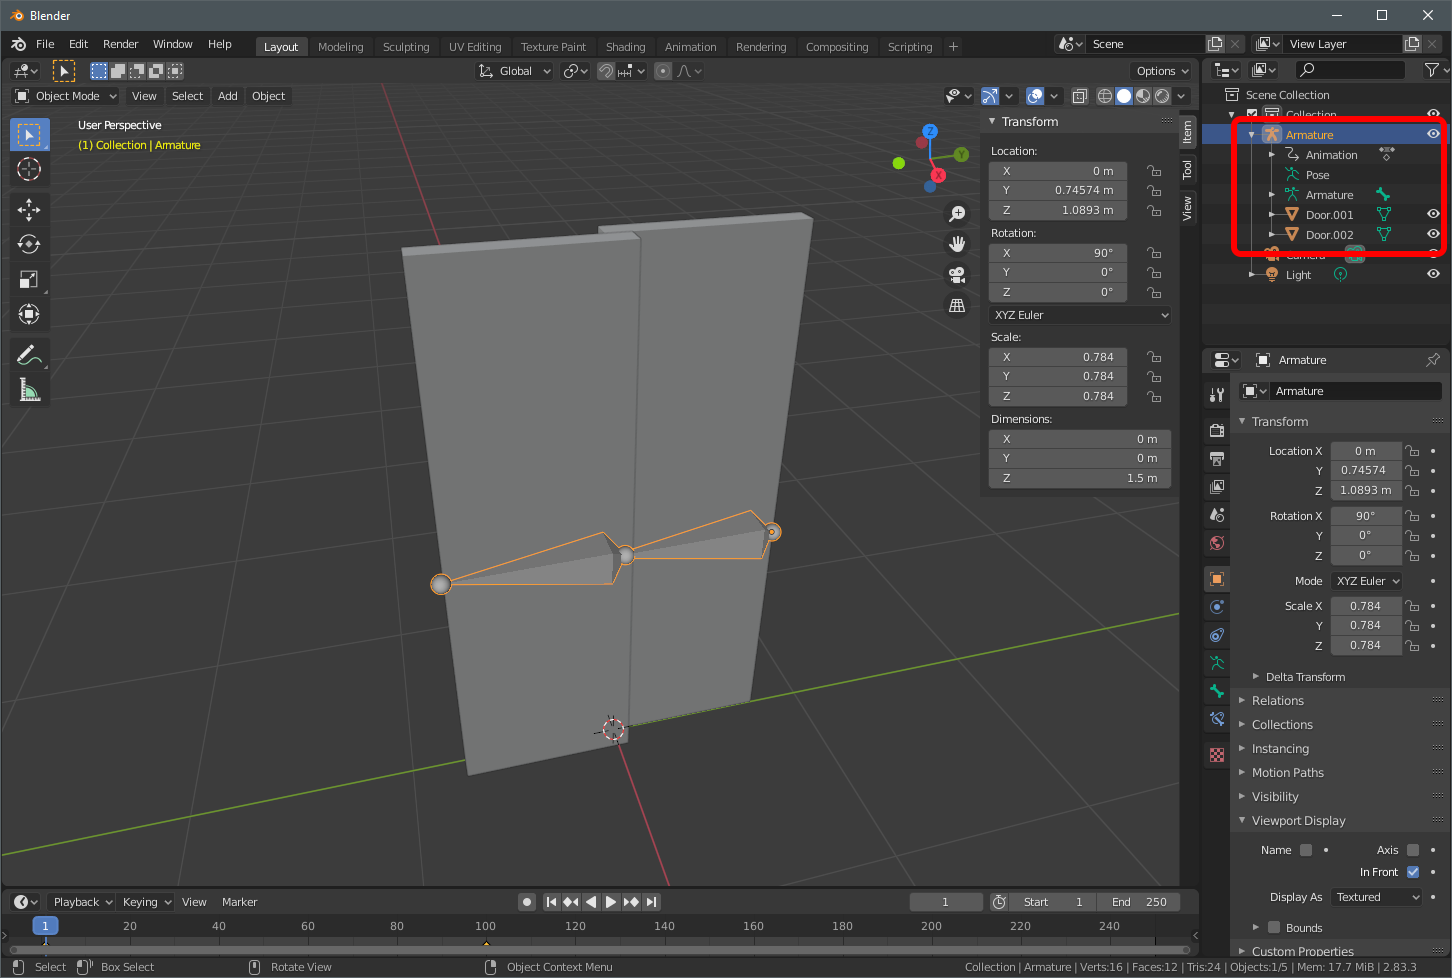
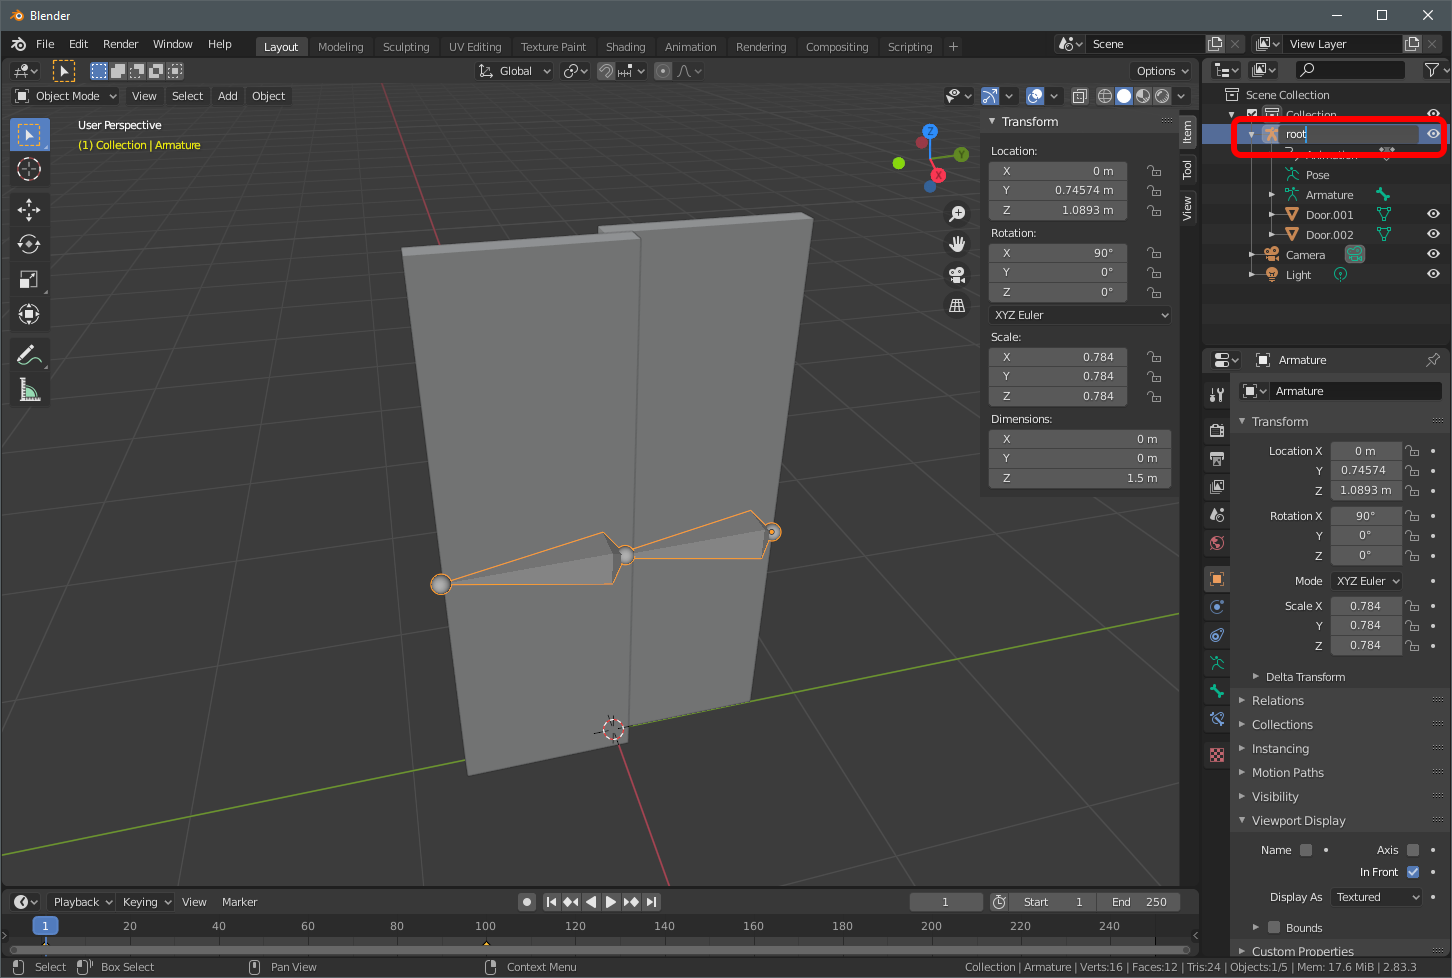
The biggest trick that you will always forget when you do this is to rename that main armature node in the hierarchy to root. Unreal Engine looks for that node name specifically and will generate errors when you import the animation with that name being anything else. Side note: This dependency to that name is not a documented thing afaik. I also just read it on a random forum post while I was pulling out my hair trying to get this working.
Next, select root and everything else in that mechanism hierarchy, go to File->Export and select to export .FBX files. There are a bunch of settings here. Check for the Object Types of the thing you’re exporting, the geometry smoothing, the axis settings and the animation checkboxes.
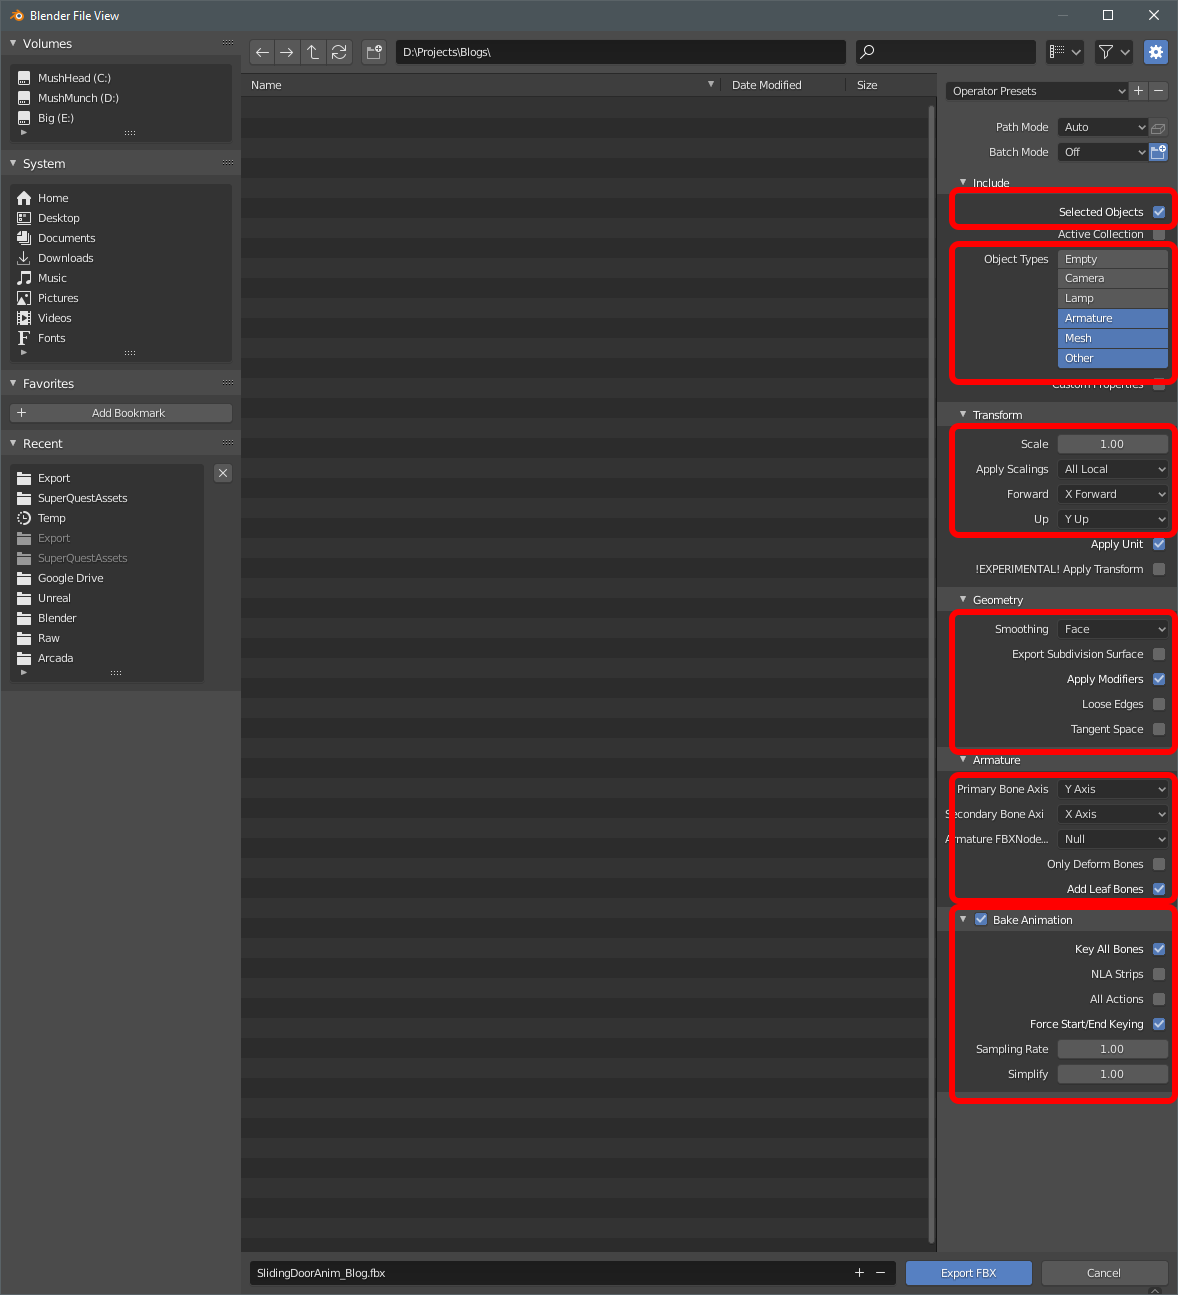
When you’ve got it set up, optionally click the + icon at the top and give it a name so that you can select these settings as a preset in the future.
Side note: You can also select not to export the armature and animations by deselecting those Object Types but leaving all the other settings the same, and setting a preset for static mesh exports.
This will create an FBX file at your chosen location. Switch to Unreal Engine and select to import this file into the content browser, again at your desired location. The import dialog should be set up to include skeletal mesh and animation too. Set the animation range manually, otherwise you’ll end up with a lot of dead time (unless you’ve culled it already in Blender).
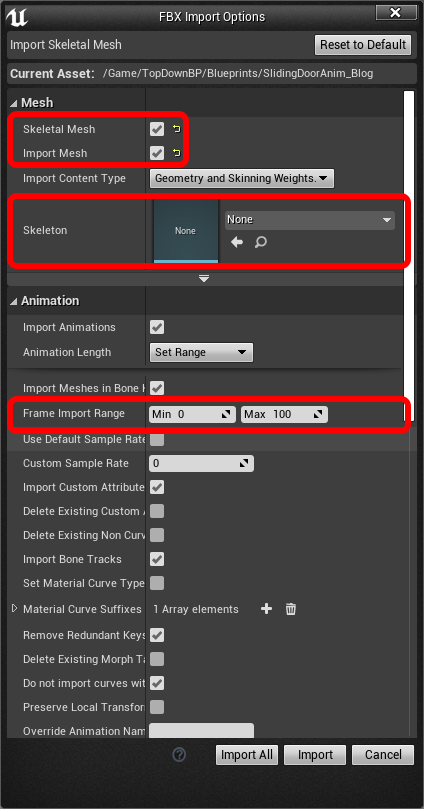
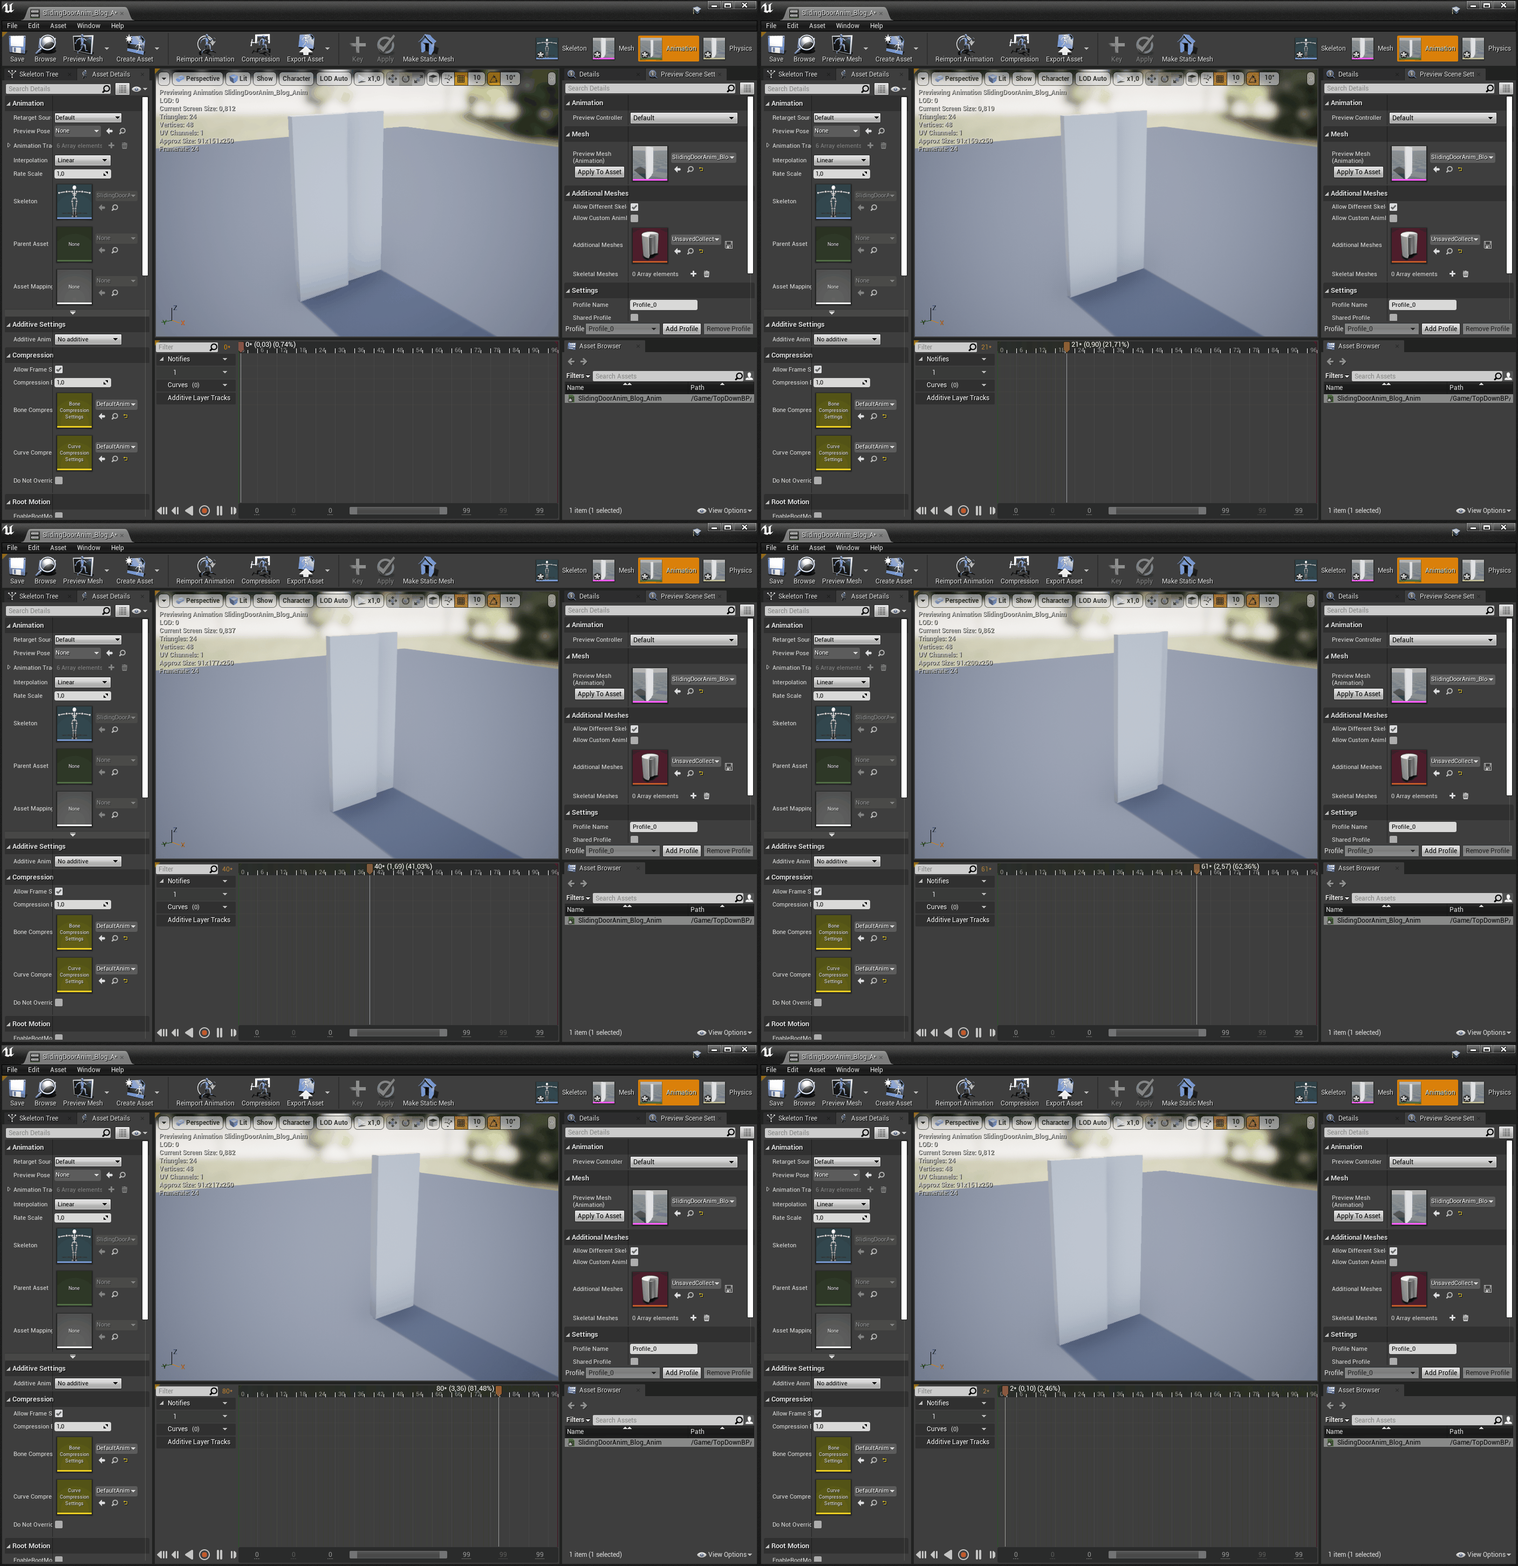
This should create four items: a mesh asset, an animation asset, a physics asset and a skeleton. Open the animation asset, and you should see the animation play with the doors sliding over each other.
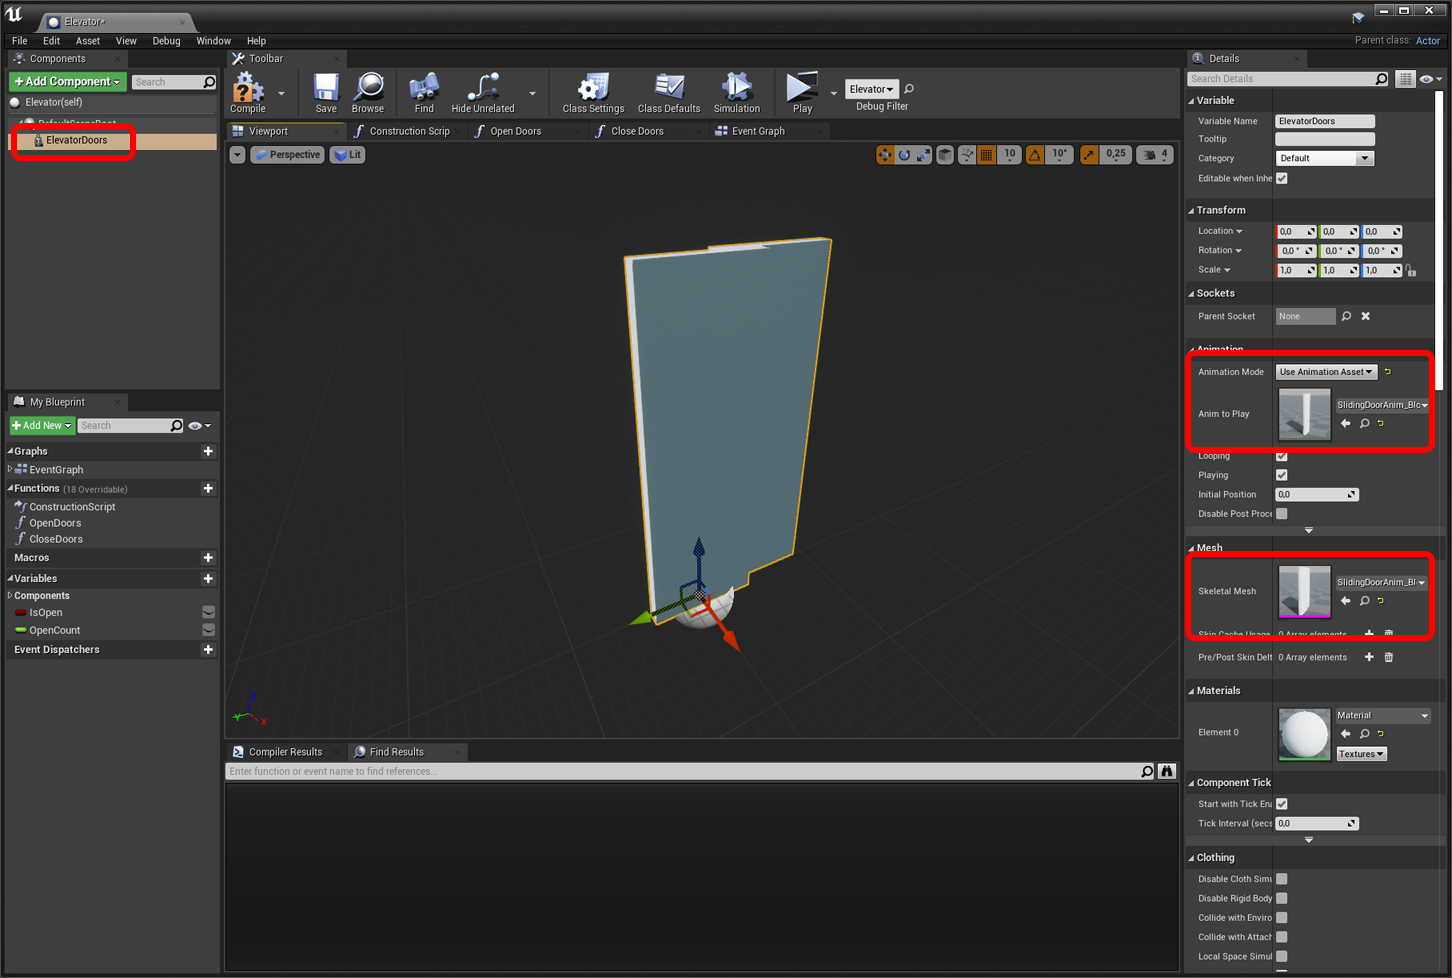
Back to the content browser, and right-click to create a new actor blueprint. This will be a blueprint for the entire elevator. In the blueprint, add a skeletal mesh component, and choose the elevator doors mesh asset as the mesh. They won’t be moving. To fix this, make sure to set the animation that the skeletal mesh should use, to the animation asset that was created when you imported. Now the doors will animate repeatedly.
Save this blueprint and load up a map if you don’t have one already. I used the TopDown template. Drag the elevator blueprint into the level and place it near your starting location. When you play the level, you’ll see the elevator doors animating in a loop. This is a good sign, but we want to control when it opens and closes obviously.
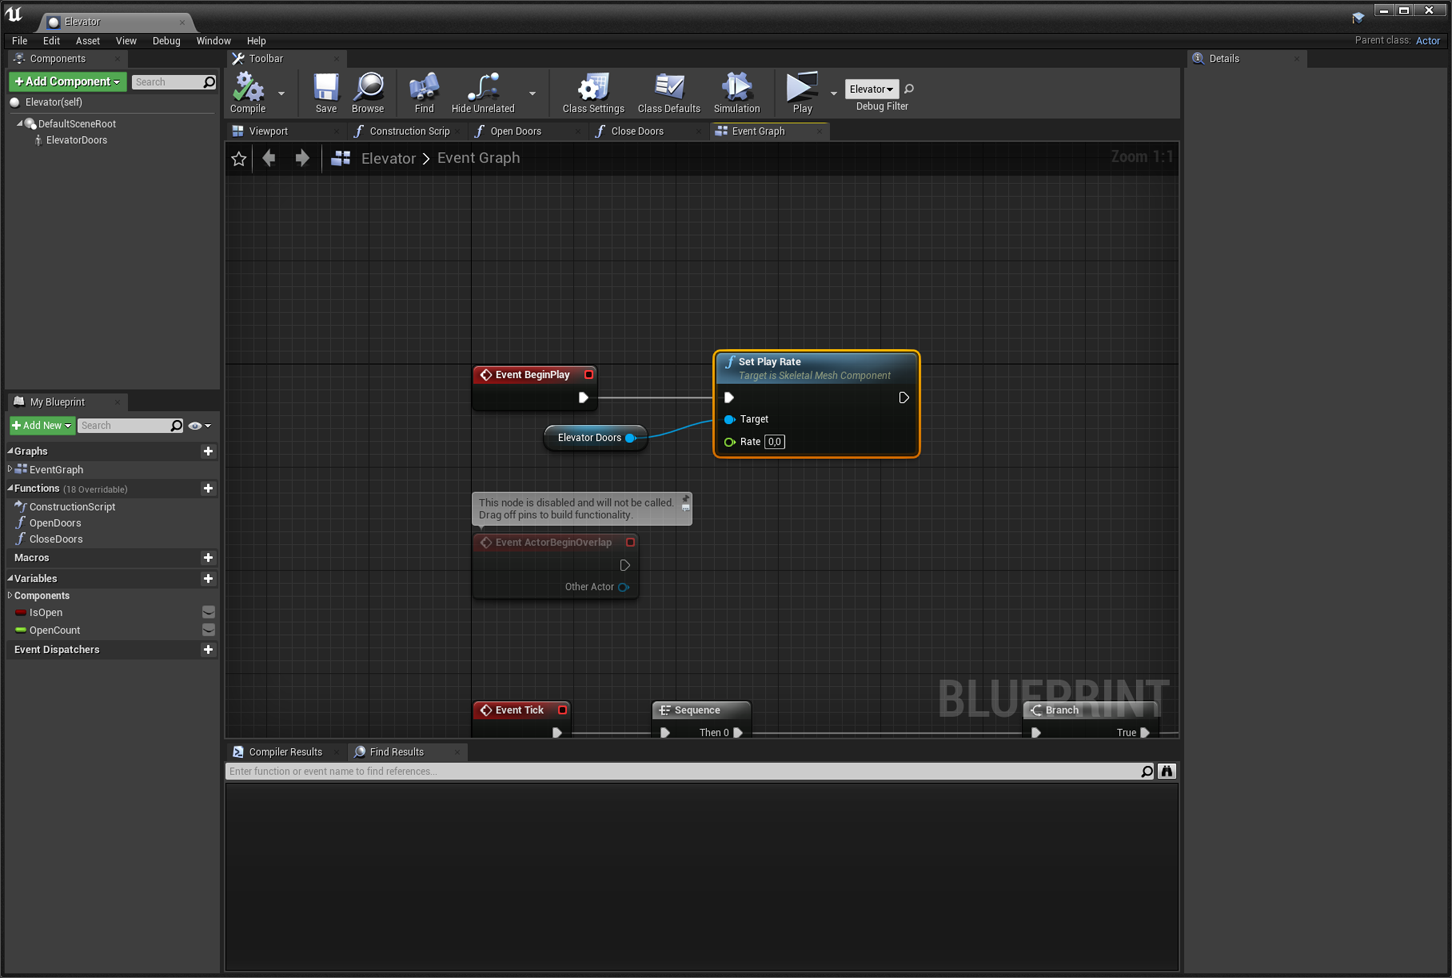
Back to the elevator blueprint and on the event graph, drag the elevator doors skeletal mesh component into the editor near to the Event Begin Play. From that node, drag a pin and Set Play Rate to zero. This value controls how fast the animation plays. Connect the execution pins, save and check it out in the level now. The doors remain closed. Great!
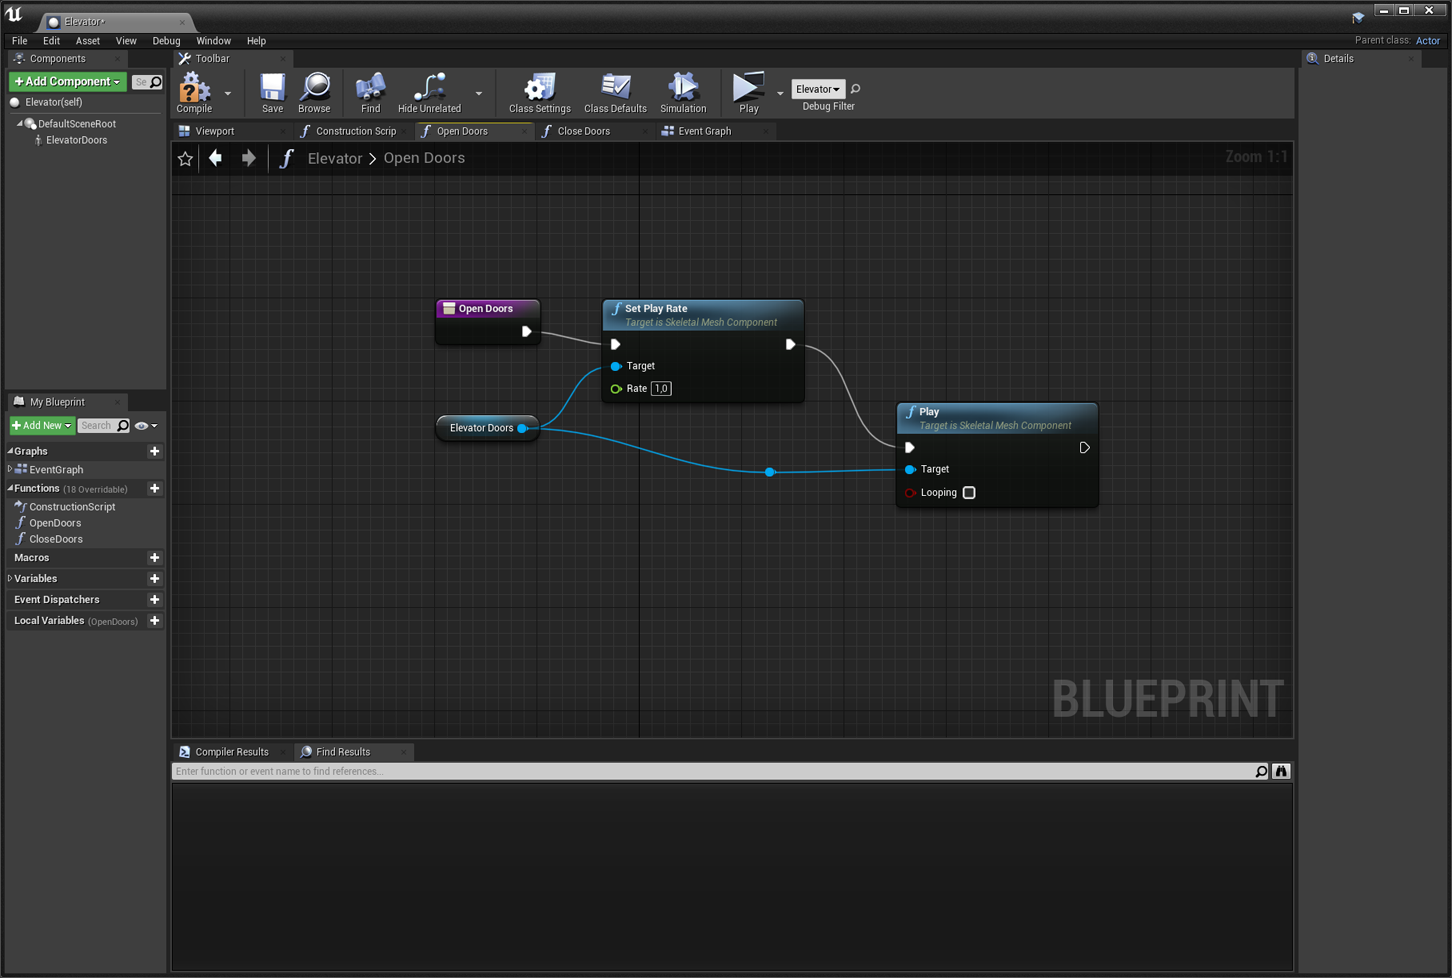
Again back to the elevator blueprint, and now create a function called “OpenDoors” in this blueprint, and drag the skeletal mesh component into the editor to create a node. From this node, drag out to Set Play Rate again but this time to 1.0, and drag again to call the Play function. Connect up the execution pins.
Save this blueprint and then back on the map, add a trigger box somewhere close to the door. Create an Actor Begin Overlap event on the trigger box. This will drop you into the level blueprint. Drag the elevator instance into the blueprint also, and drag a pin from it to call it’s new Open Door function. Connect the execution pins.
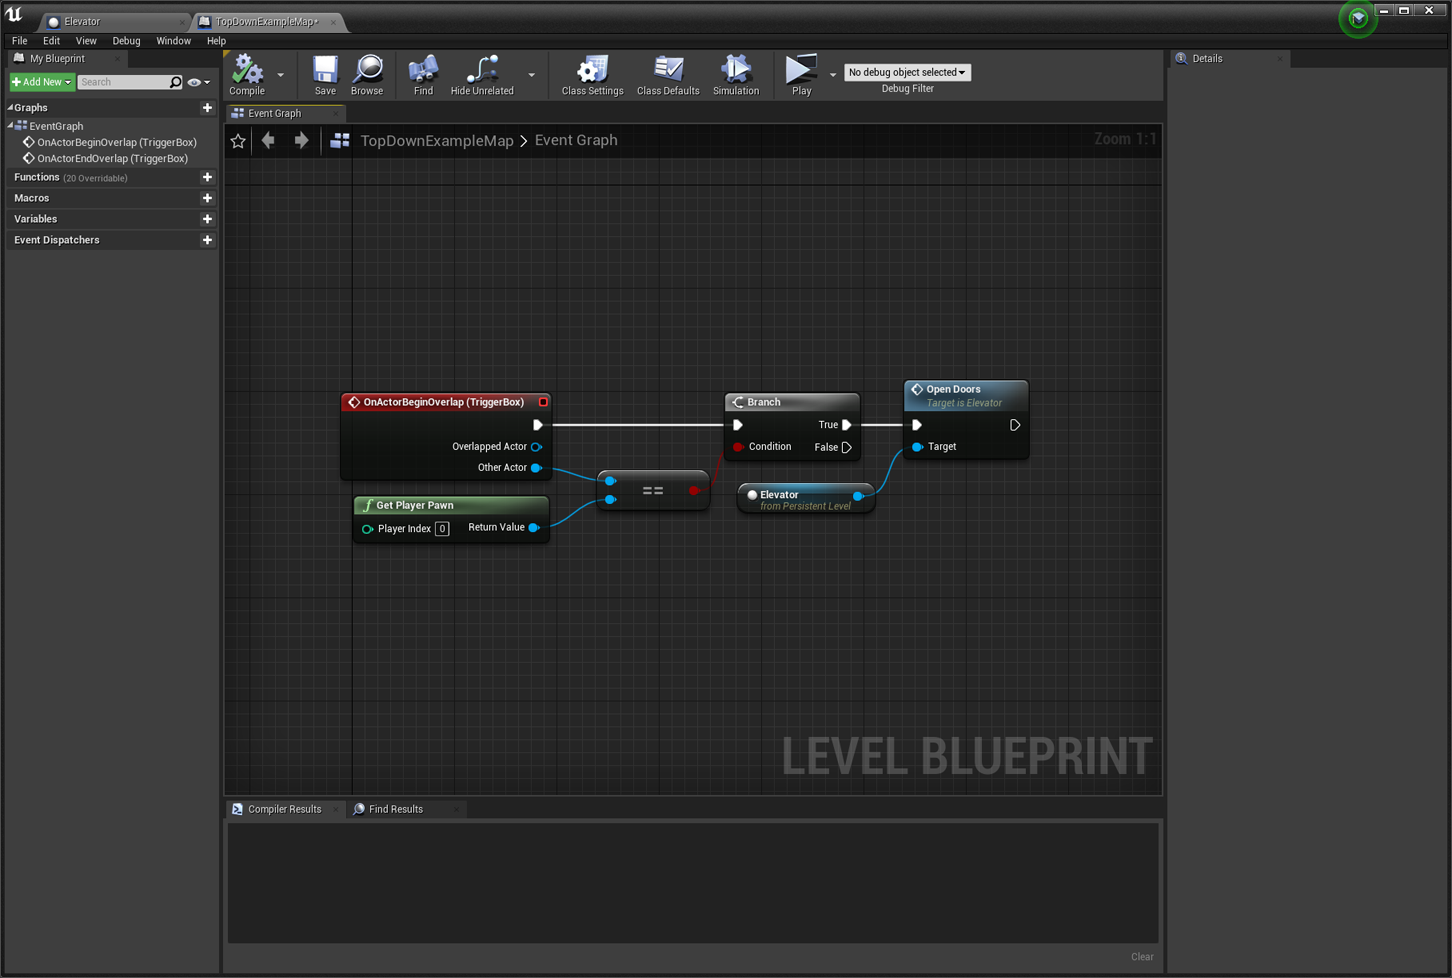
Now when you play your level, and walk into the trigger box, the doors should open. That’s cool!
Now let’s go back to the elevator blueprint. Create another function called CloseDoor. Drag the skeletal mesh into the editor again, and drag from it’s pin and add a Set Play Rate node, and set it to -1.0. Then drag from the skeletal mesh node again and call the Play function. Connect the execution pins. Now the animation will play in reverse.
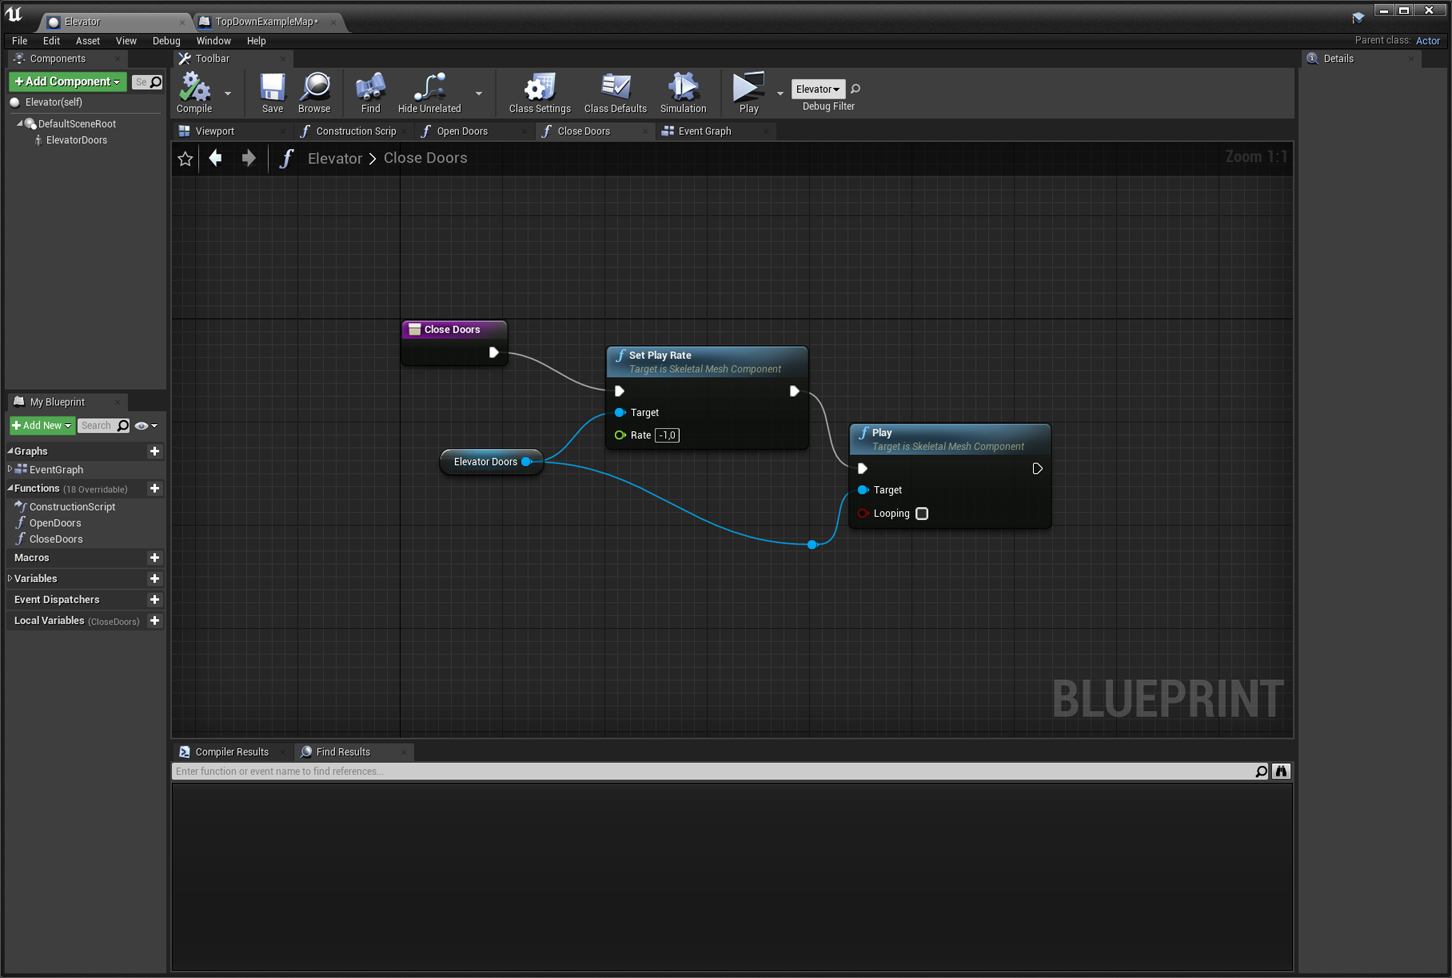
Back in your level, add the Actor End Overlap event on the same trigger box, and in the level blueprint call the new Close Door function on the elevator.
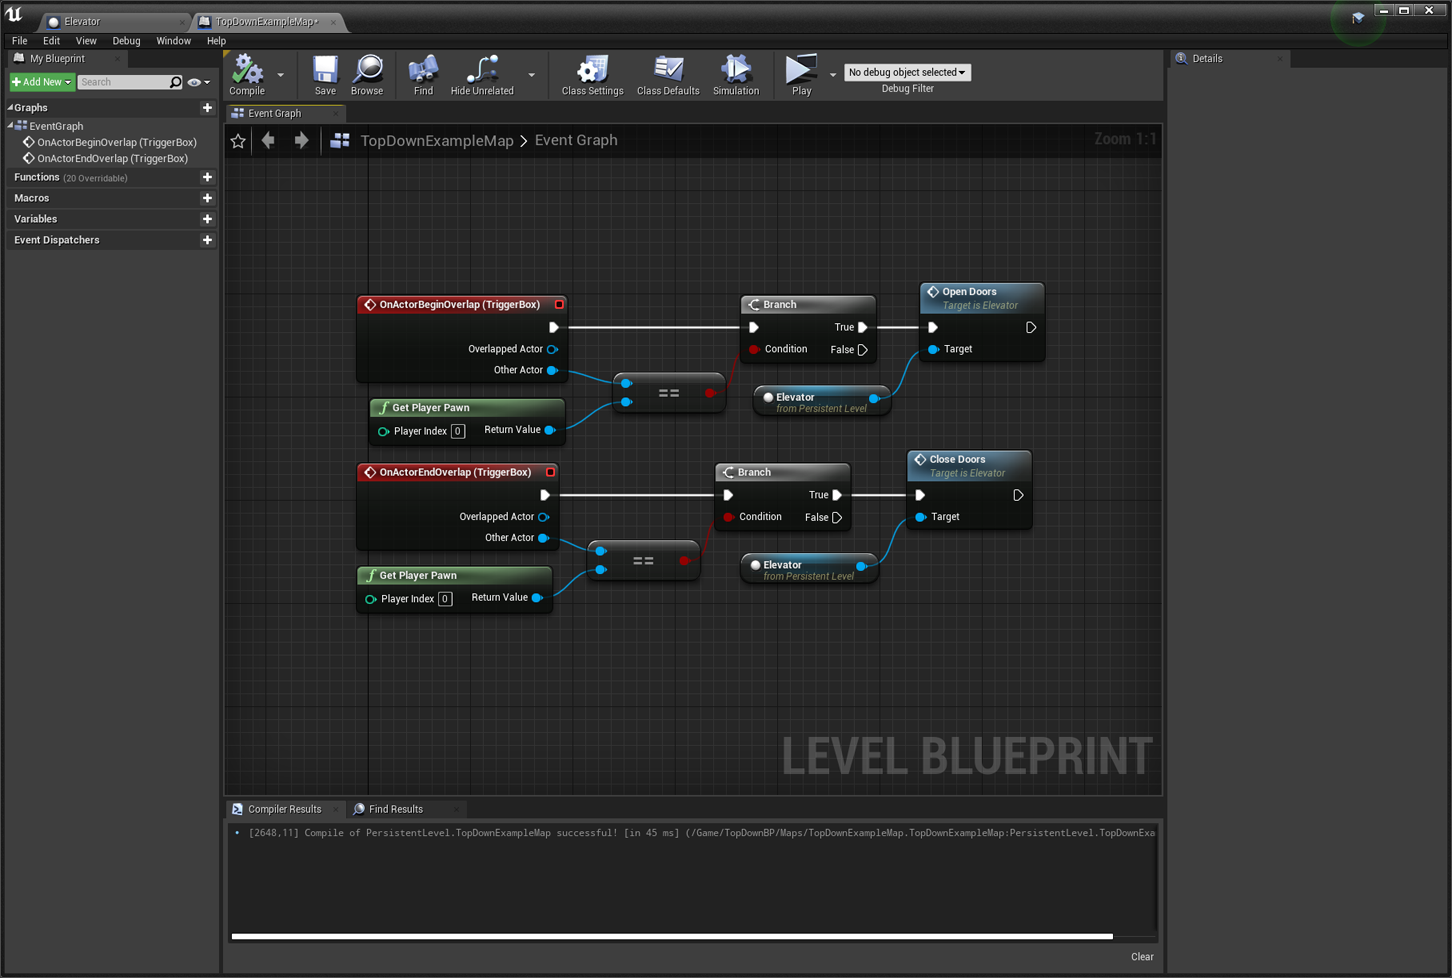
When you now play your level and enter the trigger box area, the doors will open, and when you leave the trigger box area, the doors will close.
You can of course now play around by adding state variables to add a delay to the doors once they’re open to automatically close again, and to prevent the animation from being interrupted for example, so that it doesn’t start closing while it’s still opening.
This illustrates how the elevator can be commanded by something else when to open and close the door. You can actually include the trigger box in the elevator blueprint so that each instance operates completely autonomously and then you don’t have to have open and close functions. This is great for like Star Trek type doors. Having those functions public though allows for other elements in your level to command the elevator when to open or close, for instance when completing some objective or pressing an elevator button.
Keen readers might have noticed that the doors don’t actually block navigation. You have to assign the physics asset that was created at import to the skeletal mesh in the elevator blueprint. It’s also a good idea to apply a box envelope to the doors instead of the default capsules. More information on this can be found here.
And that’s it. Export additional static mesh assets for the sides, floor and ceiling of the elevator and include it in the blueprint.
Happy devving!